Thursday 30 July 2009

On my organic soapbox


This morning started so well.

I woke too early, as usual, and did a few rows of knitting in bed until such time as I could justifiably risk waking the rest of the household - knitting with organic cotton, of course.

I went down to enjoy my usual breakfast of organic Weetabix, topped with organic dried fruits and nuts and on most days a few organically grown raspberries from my garden. I took the newspaper from the letter box and there and then - mid mouthful - my nice day stopped. The front page article purported that there is no nutritional benefit from organic foods!

I was, I am, incensed. The article admits the report is only one of several and another one contradicting this evidence is soon likely to follow, and it admits that good quality data to back up any study is hard to come by, but haven't they all totally missed the point. It's not what is in the organic fruit, dairy produce, cotton etc that we buy it for, it's what's left out!

Personally I don't want to eat food with chemicals in it and I extend that reasoning to my crafting.

I have written about the effects of chemicals on the production of crafting materials on my website http://www.julietaylor.com/

The website, I'm afraid is no longer updated as it is so much quicker to show you what I'm working on in this blog, but the article will stay there for the foreseeable future.

However, if you just want a short taster, the reason I was knitting with organic cotton this morning is this:

"Cotton production is one of the world’s most chemically intensive agricultural processes. It covers just 2.5% of the earth’s agricultural land but uses approximately 22.5% of the world’s insecticides and 10% of the world’s pesticides. Its production damages wildlife, contributes to climate change and contaminates water supplies.
20,000 people die each year from pesticide poisoning, many in cotton production. Another 3 million suffer side-effects from the pesticide residues including cancer, birth defects, respiratory problems, infertility and sterility. A single teaspoon of Aldicarb, the second most used pesticide in cotton production, on the skin can kill an adult. Two thirds of cotton is grown in developing countries where the people are least able to get medical to treat the side effects."


So please, next time you are buying yarn, consider buying organic.

Friday 24 July 2009

Stick Binding Tutorial

Right, I've bored you all senseless with family life ramblings over the last few weeks, so its time to get back to business and post about the things this blog was meant to be about.
This is a tutorial on how to make a little notebook using the stick binding method. It is a good introduction to bookbinding if you have never had a go before.
The "stick" can be any straight item that you can cut notches into. I have used a colouring pencil as I think it is kind of quirky to use something that is associated with a notebook - a bit like feeding chicks with hard boiled egg! You could also use a kebab stick, a chopstick, a garden cane or a fairly straight stick. A wooden spoon would be fun to use if you were making a recipe book.
You will need:
Paper for the pages
Decorative thin card for the cover,
Wooden stick (pencil)
Craft knife
Thread and needle
Ribbon
Bradawl or pricking tool
Eyelet (optional)
Sewing cradle (optional)

1. Cut the pages for you book, lay them in a stack and fold in half. This is a single signature book, which means all the pages are folded together in one go. To get them to lie flat it is a good idea to press them overnight under a brick or pile of books.


2. Take your pencil and trim to the same height as your pages. Mark and then cut evenly spaced notches along the length of your pencil. They don't need to go all the way round, just sufficiently far to hold the thread in place.


It was at this stage that I decided I wanted my pencil to match the book and ribbon I had chosen so I gave it two coats of acrylic paint, and a final coat of acrylic wax to make it smooth to touch, but you can equally well leave your stick in its natural state.
3. Lay the pencil in the centre of the book and mark the where the notches are along the centre fold. 4. Cut the cover for your book and fold it in half. Mine was a couple of millimetres deeper than the pages and half a centimetre wider so that I would be able to attach my ribbon to the back with an eyelet.
5.Make sure your pages are evenly stacked, place the cover on the outside and open the book to the centre.Make holes at the marked points through all the pages and cover with your bradawl . This job is so much easier if you have a sewing cradle. I will post a tutorial at a later date on how to make one. I'm not sure whether you can see from these two pictures or not - the first picture shows the first hole being made, the second shows the five completed holes.

6. Cut a length of thread. I would normally use strong linen thread, but as I wanted it to be decorative and this particular book is for immediate and short term use, not an heirloom, I used pink embroidery cotton. A piece four times the height of your book should do.
Thread your needle and take the thread through the bottom hole from the inside of the book to the outside. Leave a tail long enough to tie a few knots later.

7. Pass the thread round the base of the pencil, making sure it sits securely in the bottom notch, and back through the same hole to the inside of the book.


8. Take the thread out through the next hole, round the pencil and back in through the same hole again. Continue in this way until you have completed the last hole.


9. Put the thread tight, checking that it is held in each of the notches and tie several knots around the last stitch. Cut the excess thread away and tie the tail at the bottom in the same way. If you are worried that your knots may come undone, put the tiniest dab of PVA glue on each knot and allow to dry well before you close the book.


10. Place a length of ribbon around the book and attach to the back cover with an eyelet. As it is a single signature book it is prone to gaping open, so the ribbon will help keep it in good condition.

11. Now for the fun part - decorate your book and enjoy using it!

Tuesday 21 July 2009

The Travelling Quilt

This is the quilt that Laura has been making that I promised to show you.

The quilt set off with them on their travels on Sunday. They will spend three months touring Europe in their prize possession, the red camper van, otherwise known as Bertie.

There were times when we thought she would be busily sewing her round way Europe instead of sight seeing as it just didn't look possible to finish it in time,but finished it is and it is fantastic!

A traditional quilter would hold up their hands in horror, the seams aren't turned under, they are all top stitched in different stitches, there is a whole variety of fabrics from wincyette to jersey to cotton. But it is a memories quilt, which will hold both stories of their past and all the tales from the travels. It will wrinkle when it is washed, and parts will fray, but that is all part of the charm. Some of the sections are made from old T shirts that neither would part with as they were long term favourites, old pyjama bottoms, old quilt covers and scraps from other projects. There are hand made embellishments such as felt flowers and birds and little appliqued people. It truly is a work of art.

I believe they are in the vicinity of Paris at the moment, trying to pack as much sight seeing as they can into a few days before the pace slows down to savour the flavour of true rural France, then Spain and Italy and so much more. They have their hand made journals to entrust all the memories to, of course, but I suspect the quilt will be the item that is pulled out many years from now, to remind them of the adventures they had in Bertie the van, discovering Europe

Monday 13 July 2009

Cuttlebug ideas

I have posted these pictures for everyone at Solihull Craft club.
I am giving a demonstration of the Cuttlebug there tonight, so these are some reminders for you of the cards and the techniques that you will see.


I've used Core'dinations cardstock for this one and rubbed over
the embossed areas with an emery board so that the lighter
colour core shows through.
The snowflake is one of the "cut and emboss" sets.


This is a small section of a Christmas village embossing folder.the embossed houses are highlighted with Sakura glitter pens and the "noel" is cut from scraps of mountboard, painted and glittered to make my "chipboard" letters


You can cut a lot more than just card on the Cuttlebug, including metal shim, vellum and a whole range of fabrics. I made a needlecase and then cut felt flowers and letters to decorate the front.


I use Pelmet Vilene quite a lot in my mixed media work and it's beginning to creep more frequently into my cardmaking too. This little heart was cut from Vilene on the Cuttlebug. I then painted it with Lumiere paints in pearlescent emerald and halo pink-gold, and embroidered it. I could make these little embellishments all day long!


I demonstrated this technique on the Crafts Beautiful stand at the Hobbycrafts show, NEC, Birmingham last November, so you may recognise the samples from there.
I have applied an inkpad to the indented inside of the embossing folder (sometimes called the negative or the female side of the folder). I then place the card or paper into the folder in the normal way and run it through the Cuttlebug. The ink only adheres to the background once it is embossed, as hopefully, none went down into the hollows when I was applying it to the folder. You get different looks depending on the type of inkpad and card that you use. Just remeber not to use a Staz On. all the rest wash off the folders fine. The card on the left had a fluid chalk inkpad onto pearlescent card. The card on the right had an embossing pad onto cream mat cardstock. Once I had embossed the card in the Cuttlebug I then sprinkled it with gold embossing powder and heat embossed it.

This final pic shows embossing on ordinary kitchen foil. I take a piece of foil and fold it in half to give it extra strength. I then colour it with alcohol inks or two or three colours of Staz On.

This one is a mixture of Eggplant and Cranberry alcohol inks, with just one tiny drop of blender. Give it a second or two to dry. (Voice of experience speaking here - yes I've had to use blender to get the alcohol ink off the inside of my embossing folder before now!) Place it in the embossing folder - this was the hearts one.
Run it through the Cuttlebug, trim the edges and matt and layer. Simple and effective!
The two smaller hearts are Sizzix Originals dies, embossed with border embossing folders and highlighted with glitter pens.

Phew! This has been a long post, but hopefully it helps you remember what you saw, and is of interest to other people who may be reading, as well.

Sunday 12 July 2009

All good campervans should have one


In a week's time my youngest son Mike and his girlfriend Laura (the same Laura that works on the artwork for the Making Cards Specials with me) are going travelling in a campervan round Europe for a few months. They have been planning the trip for a very long time and as departure day draws nearer the list of jobs still to do become more urgent. Mike has been making storage boxes that fit the available space to best advantage and Laura has been sewing away on a very special quilt. I'll have pictures of that later - its soooo nearly finished, but not quite!

Trying to fit everything you need for a long period of travelling in one van has proven to be quite an art. Everything needs a home, including the pegs, so Laura cut some felt letters to label the drawstring bag
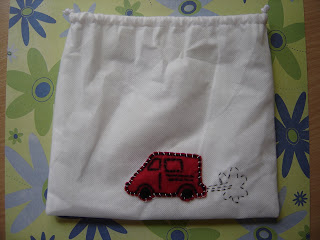
But this isn't just any old peg bag, its the campervan pegbag, so they decided to embroider a little picture on the back.

They BOTH wanted to do the sewing on this bit - even to the point where they were fighting because they both wanted to embroider the wheels !

I think its so cute!

Monday 6 July 2009

Hot and Sunny Lake District


I have just spent a fantastic week in the Lake District.

We always have one family holiday a year - me, my sons and their girlfriends and for the last four years we have always had rain, no matter where we went, so this year we were delighted to have a heatwave.

We had such a fantastic view from the cottage that I just want to put it in my pocket and bring it home with me.

I have some lovely photos and some great ideas for some mixed media and stitching projects to use them in, but that will have to wait for a while as I have a few Etsy orders to fulfil first. I'm really pleased with how Etsy is going. It is a very rewarding way to raise money for Leukaemia Research